Assembly instructions Strain relief for GPU cables
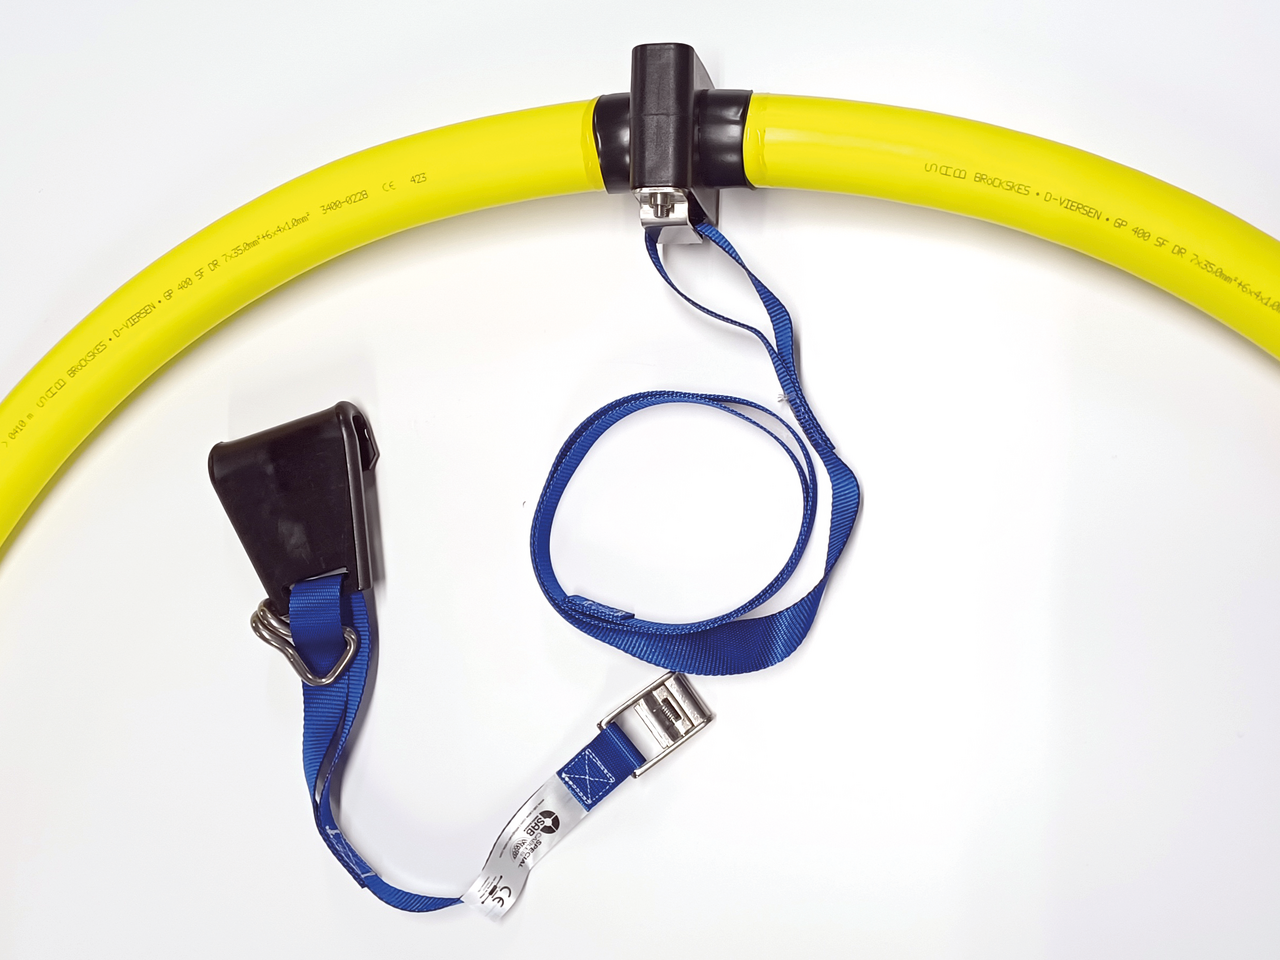
Strain relief for GPU cables
The strain relief serves as a reliable safety measure to prevent the cable from being accidentally pulled out of the connector receptacle on the aircraft. It can be easily attached to the connector – either using a hook or, on certain aircraft types such as the B737/B757, using a special plastic claw.
Main characteristics:
Secure hold thanks to the plastic claw, without damaging the aircraft
Quick and easy assembly
Stainless steel strap clamp and hook, corrosion-resistant, even when in contact with de-icing agents
Webbing with flame-retardant properties for increased safety
Strain relief for GPU cables
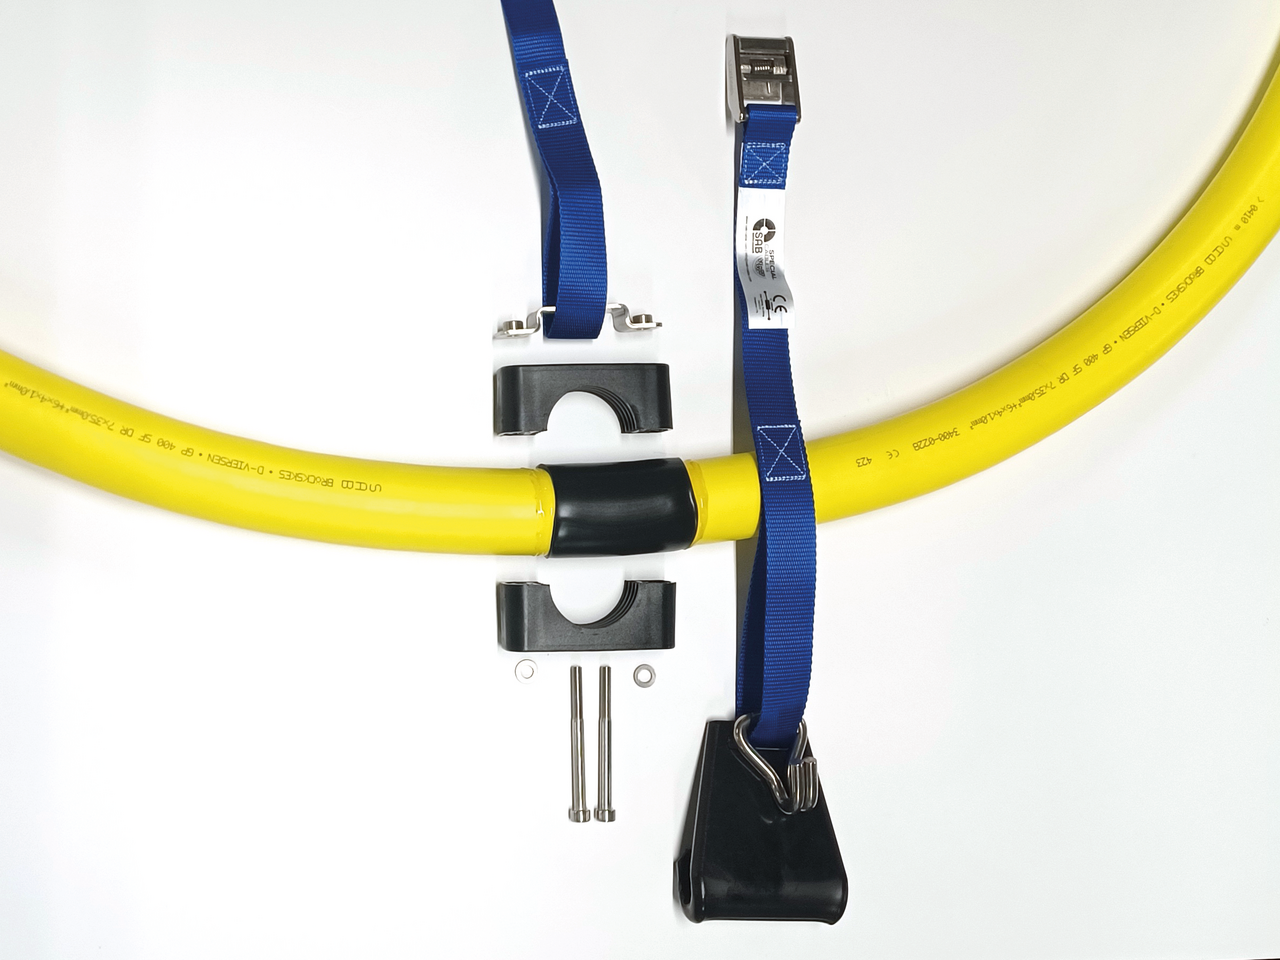
Assembly instructions for strain relief with plastic claw
Art.-Nr. S3400-9101-00000
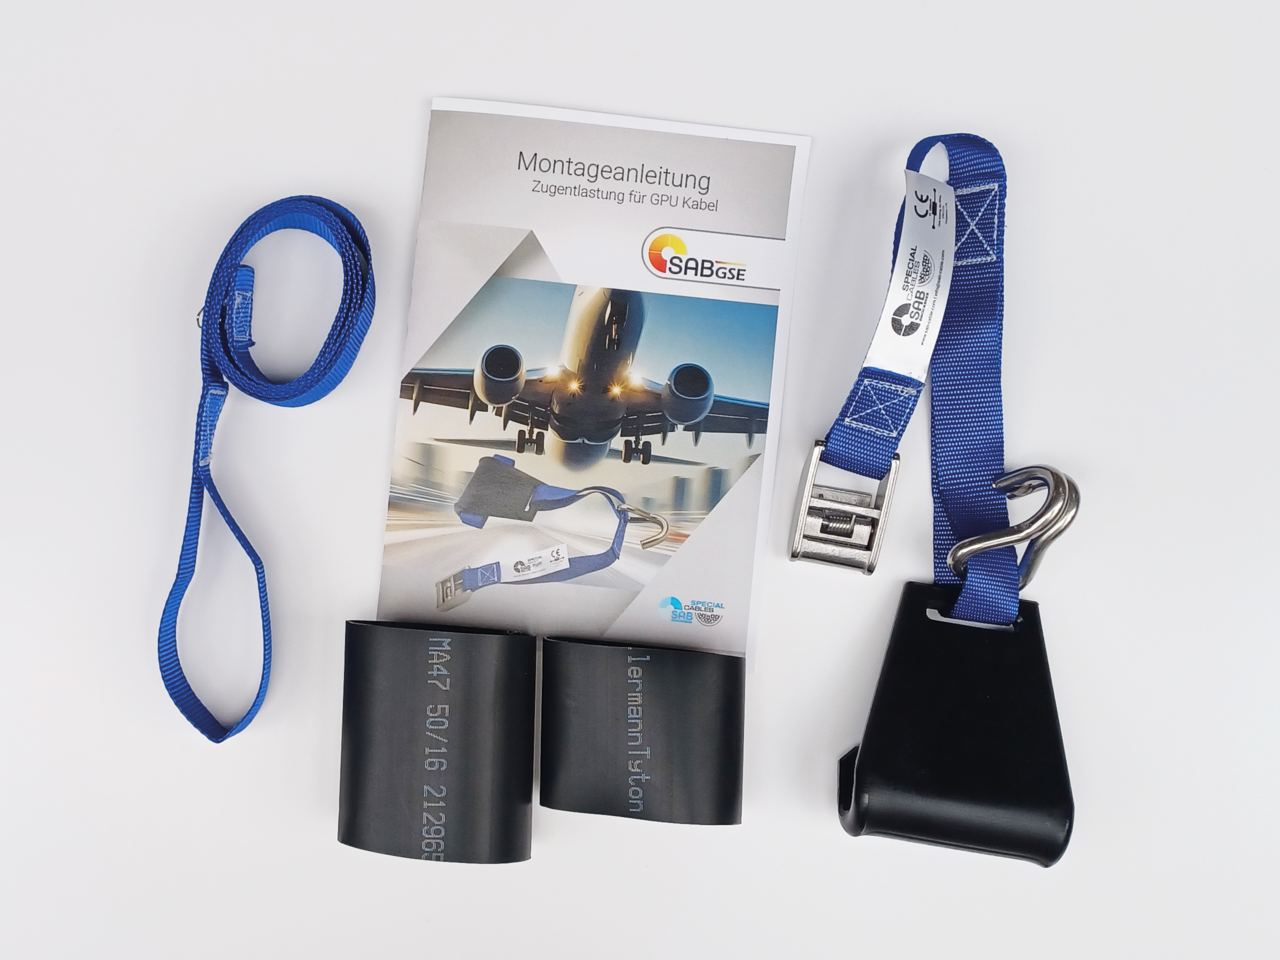
Distribution package
Plastic claw and steel hook
Webbing with loop
2 heat-shrink tubes
Art.-Nr. S3400-9101-00000
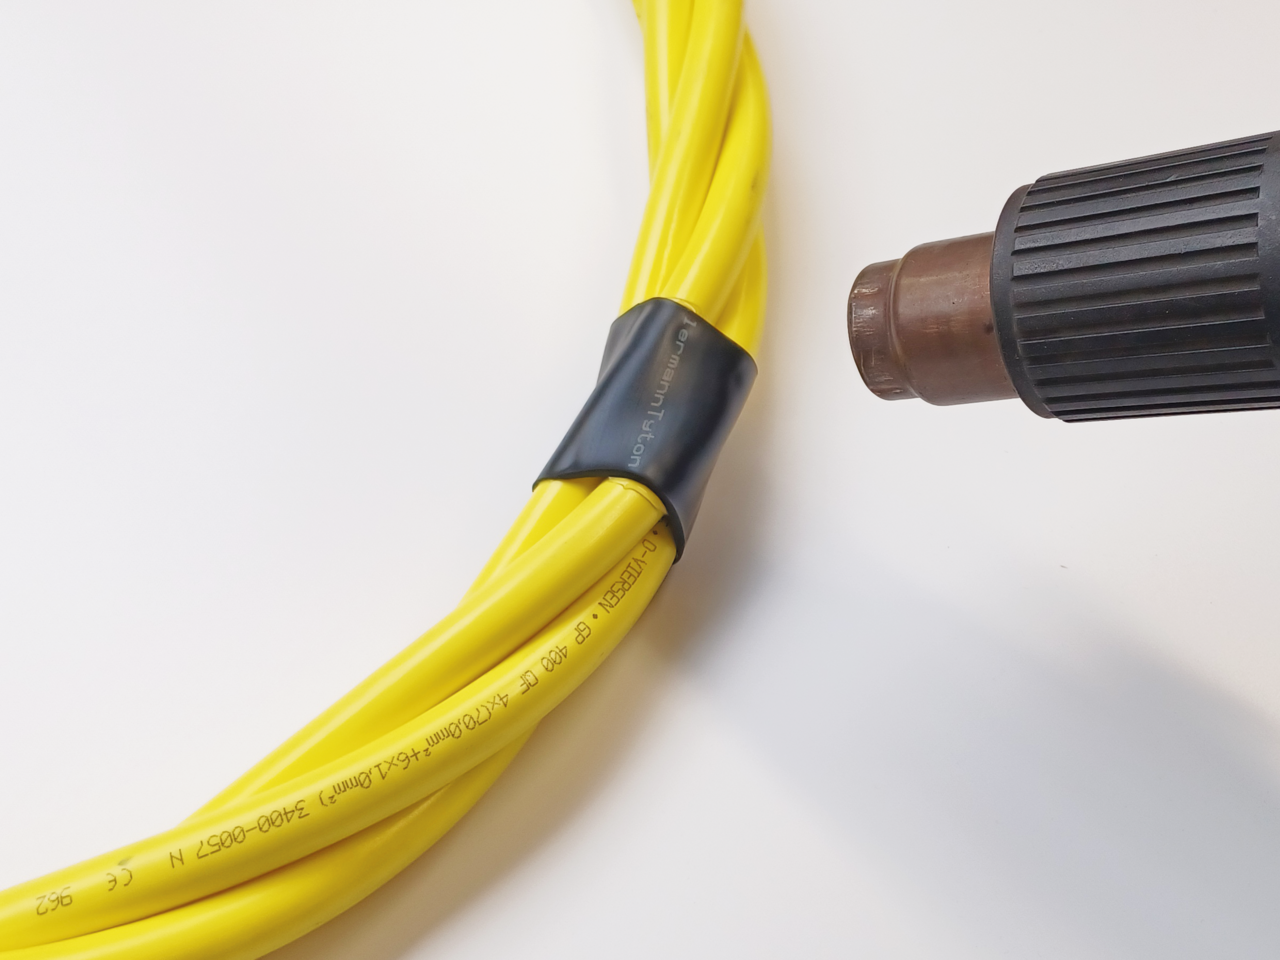
1. Prepare heat-shrink tubing
Slide the shorter heat-shrink tubing onto the cable at the point where the strain relief is to be mounted (usually about 1 metre from the plug). Then shrink the tubing using an industrial hot air gun.
Step 1
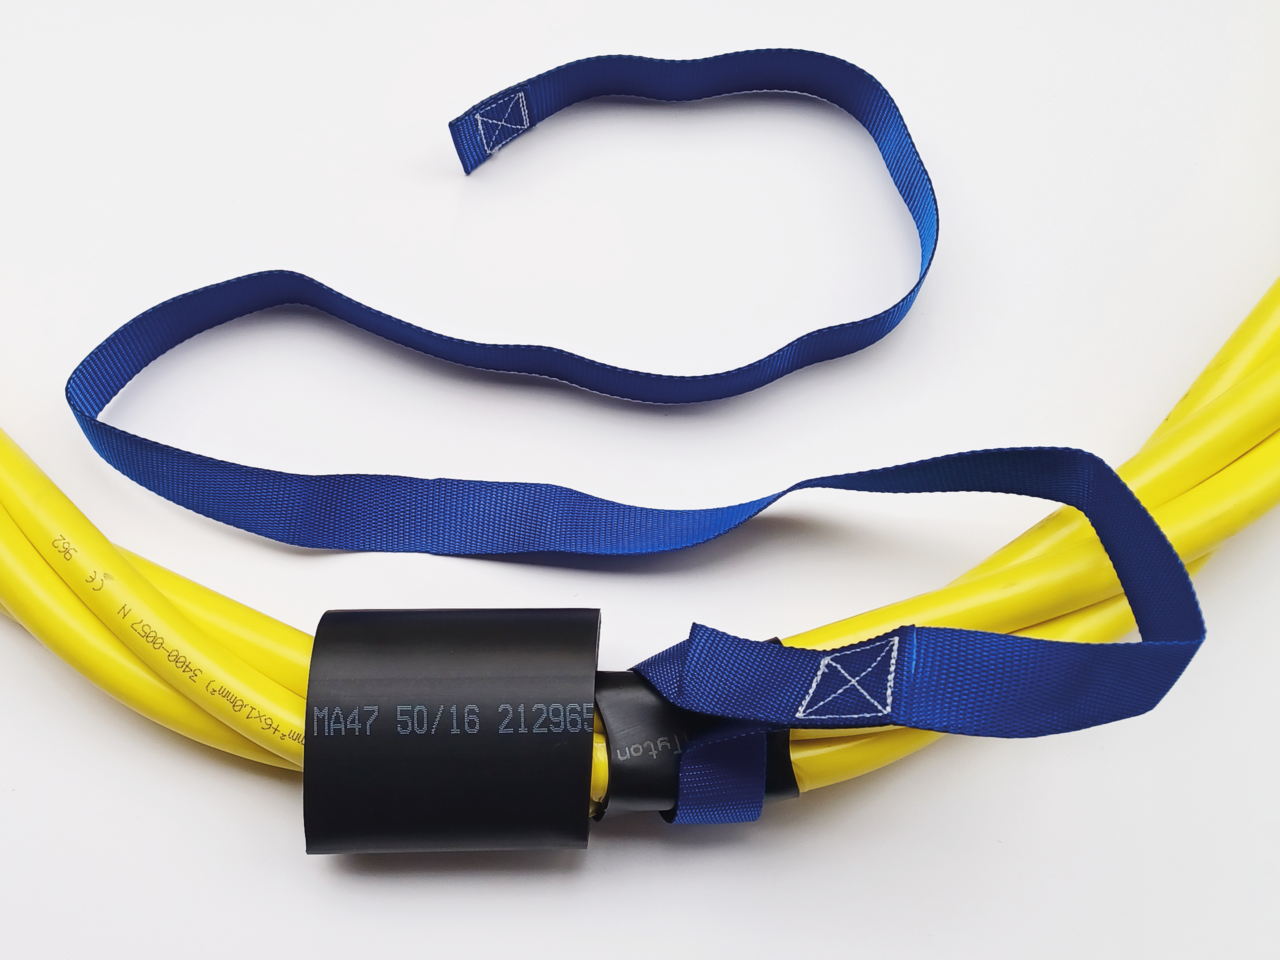
2. Attach belt with loop
Pass the strap through the loop and pull it tight on the heat-shrink-tubing.
3. Secure the loop
Slide the larger heat-shrink tubing over the loop and shrink it as well using the hot air gun. The loop is now securely fixed in place.
Step 2 and 3
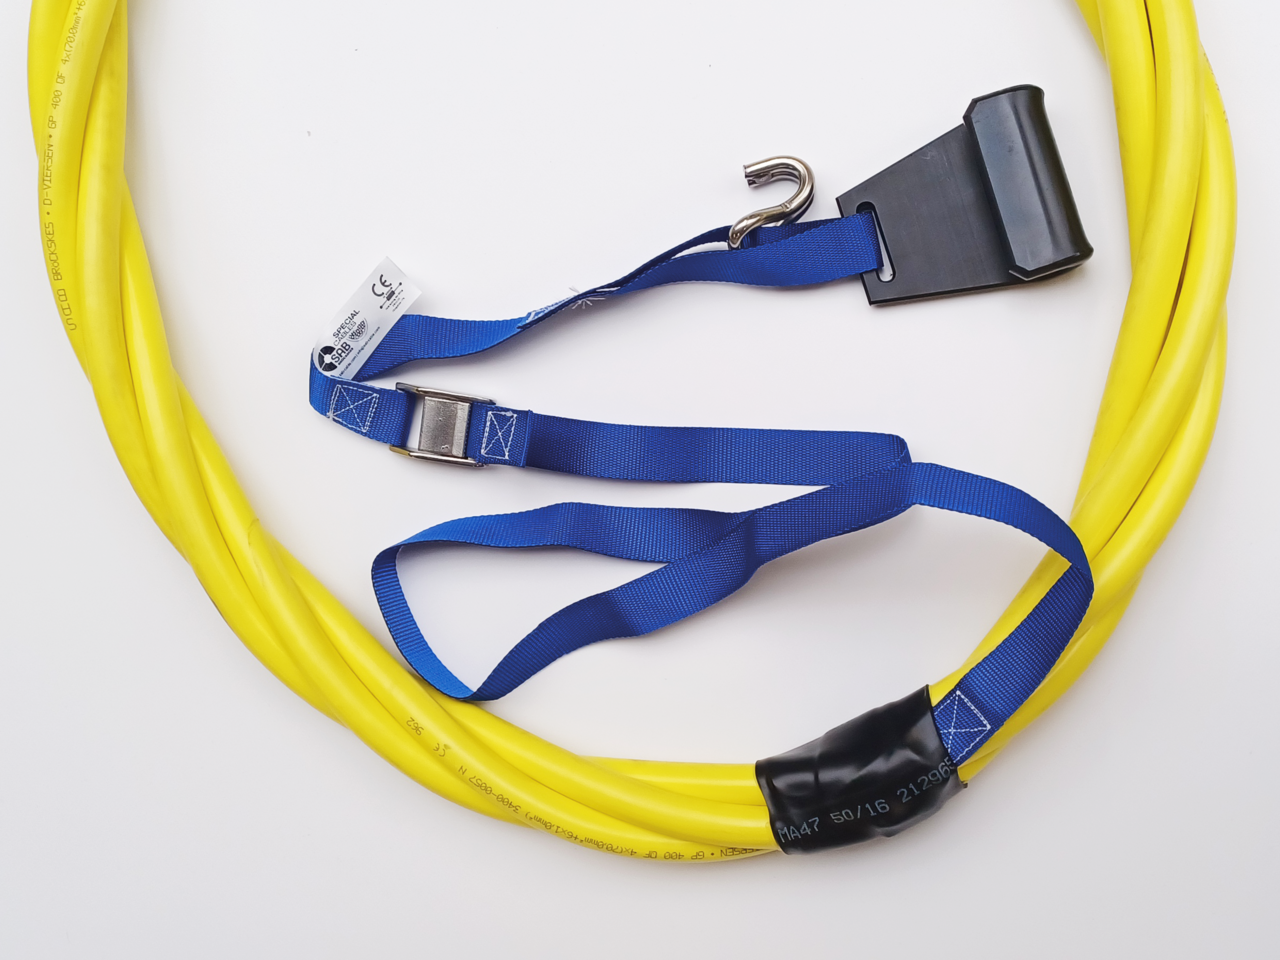
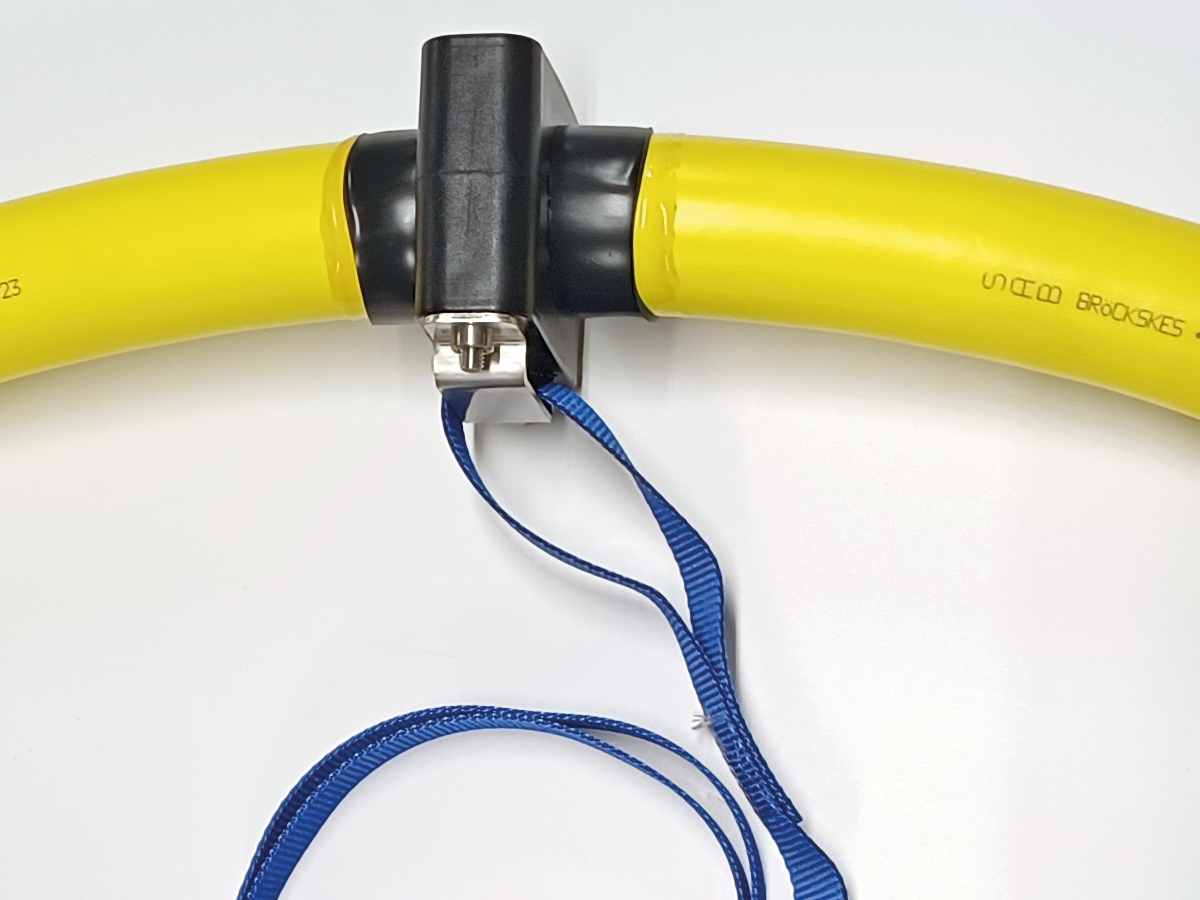
4. Strain relief ready for use
Pass the loose end of the strap through the stainless steel strap clamp. The strain relief is now ready for use.
Step 4
Do you have any questions about our products? Your direct line to the SAB team
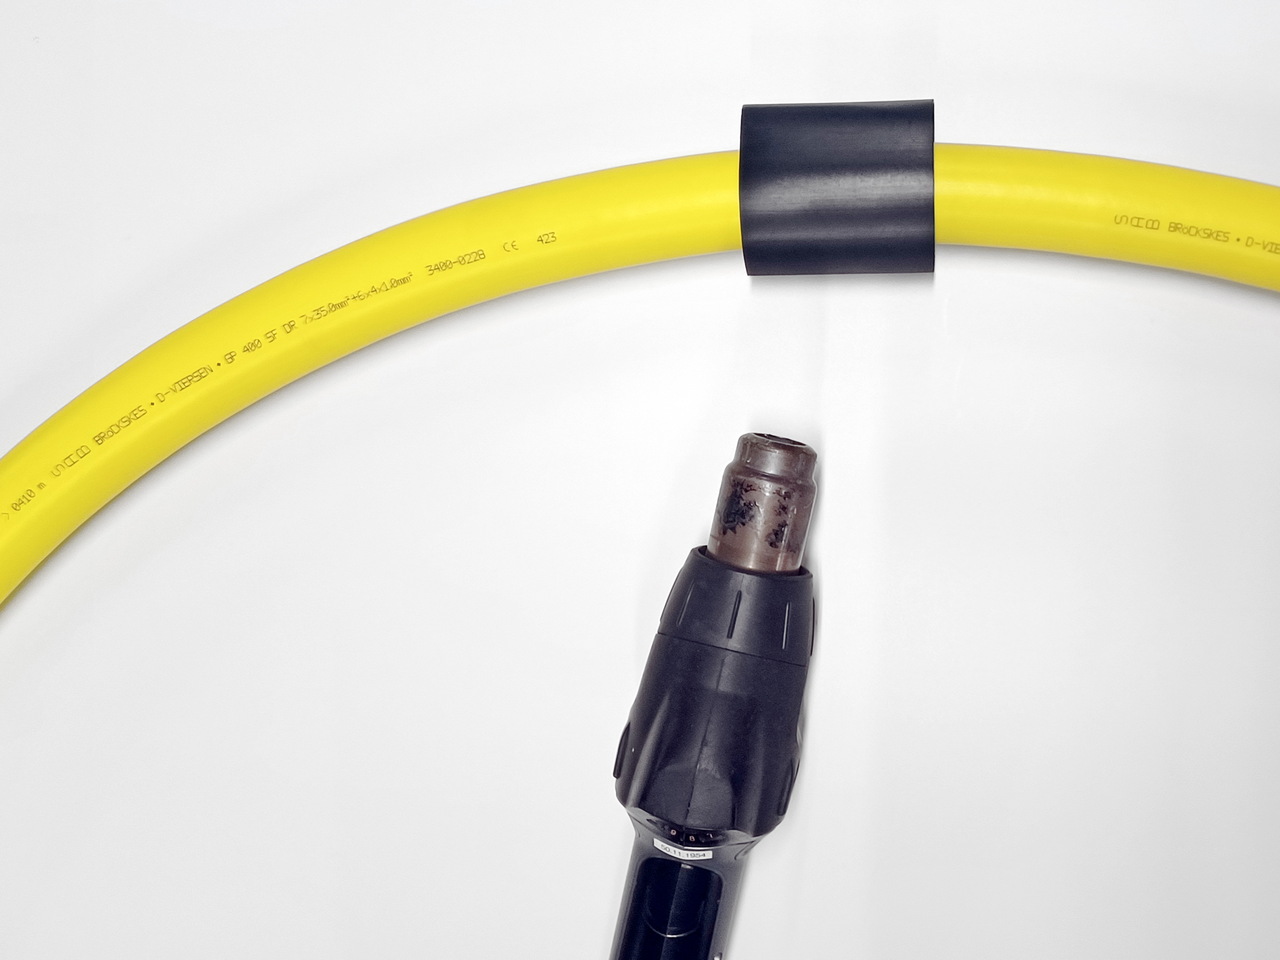
If necessary, also attach the strain relief clamp of the S3400-9100-00000 system to already assembled cables.
Step 1
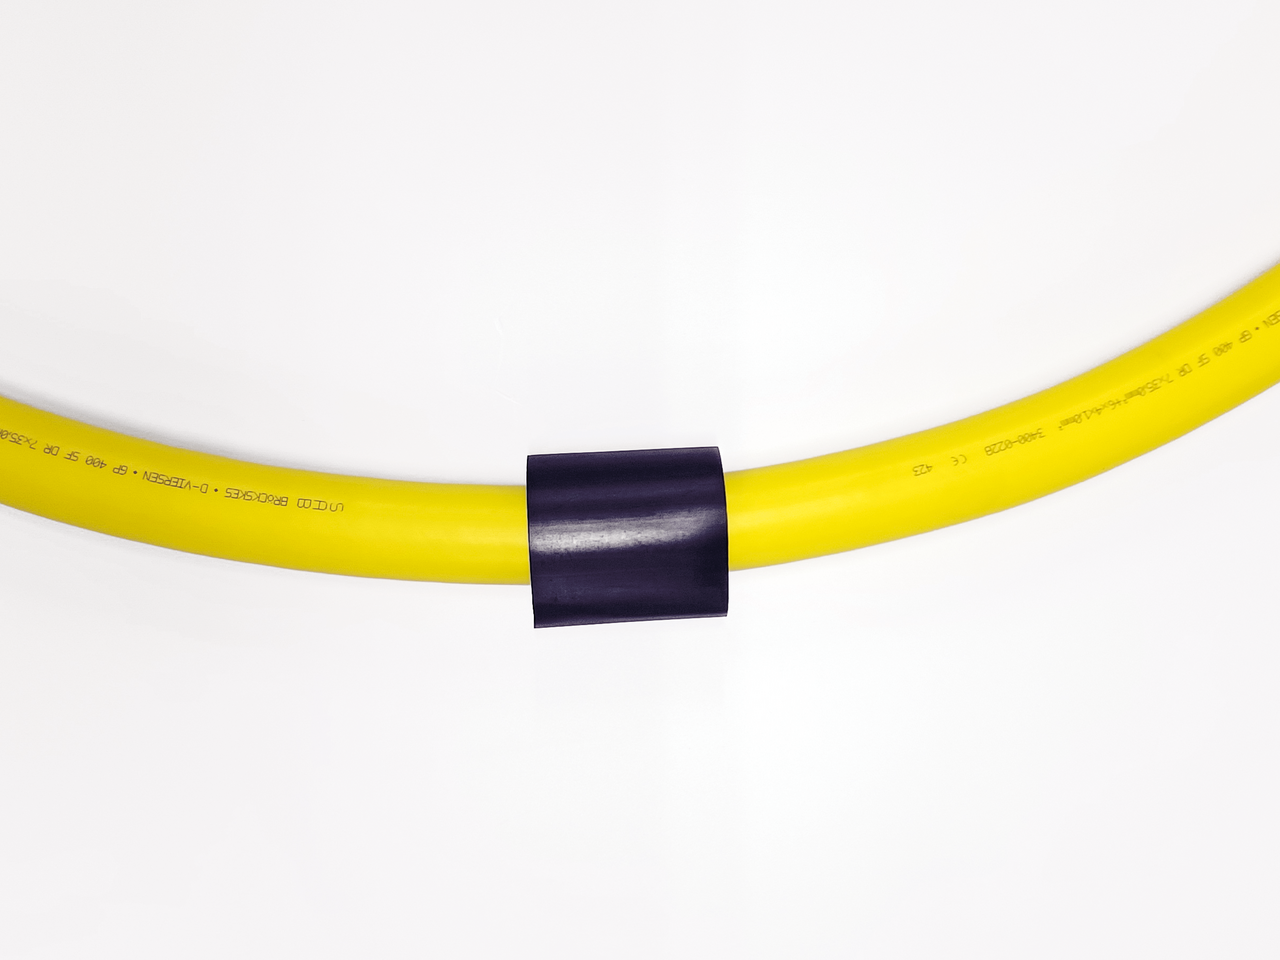
2. Protection of the cable
If the cable is already connected to a device, apply a self-sealing tape or suitable insulating tape at the designated position. Otherwise, fit the heat-shrink tubing provided.
Step 2
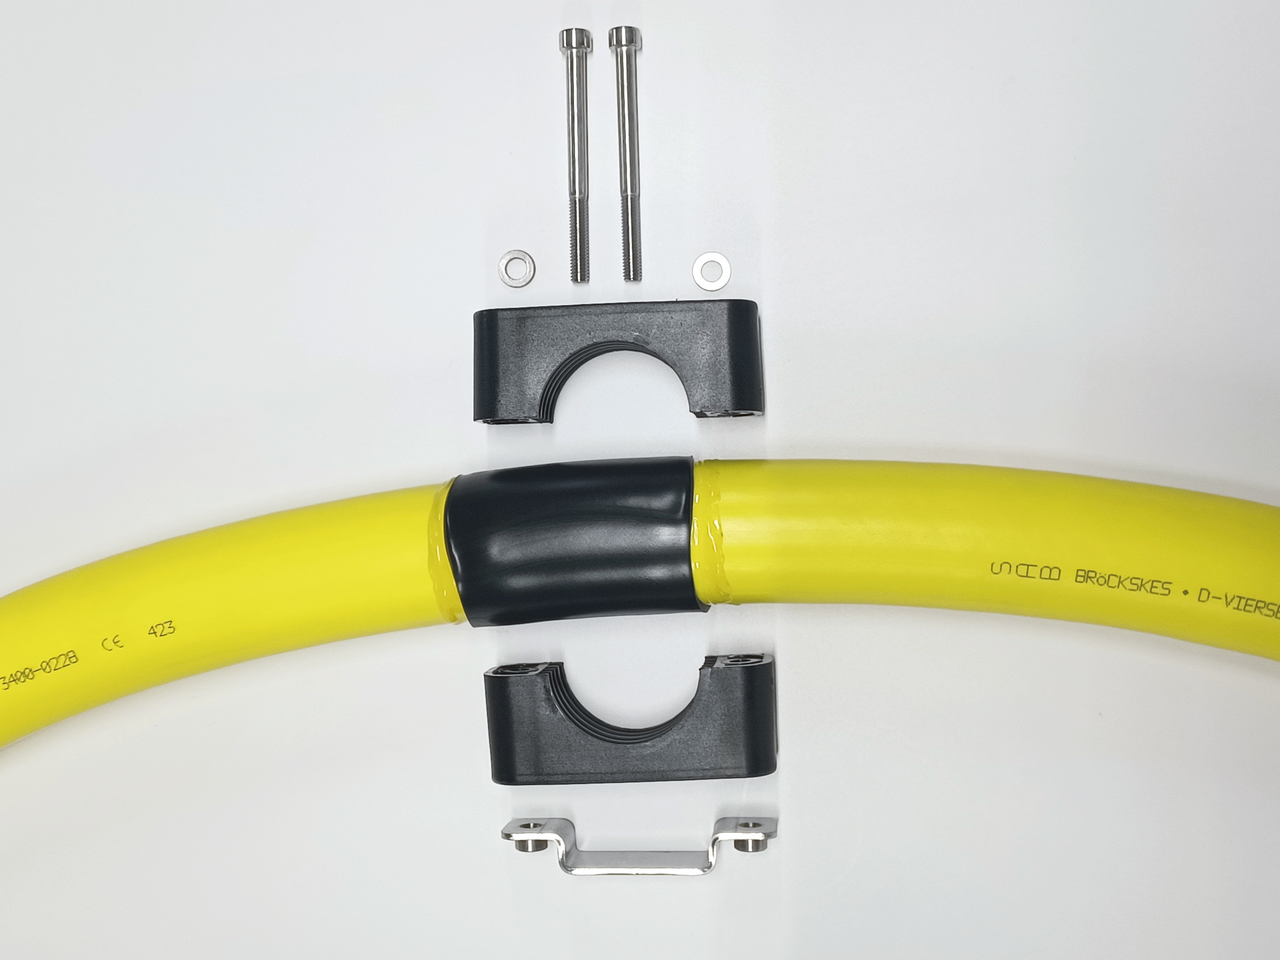
3. Screws and washers
Then place the washers onto the screws.
Step 3
4. Threading the strain relief strap
Thread the strain relief strap through the metal retaining brackets.
Step 4
5. Positioning the cable clamp
Position the cable clamp in the center of the prepared area/tape.
Step 5
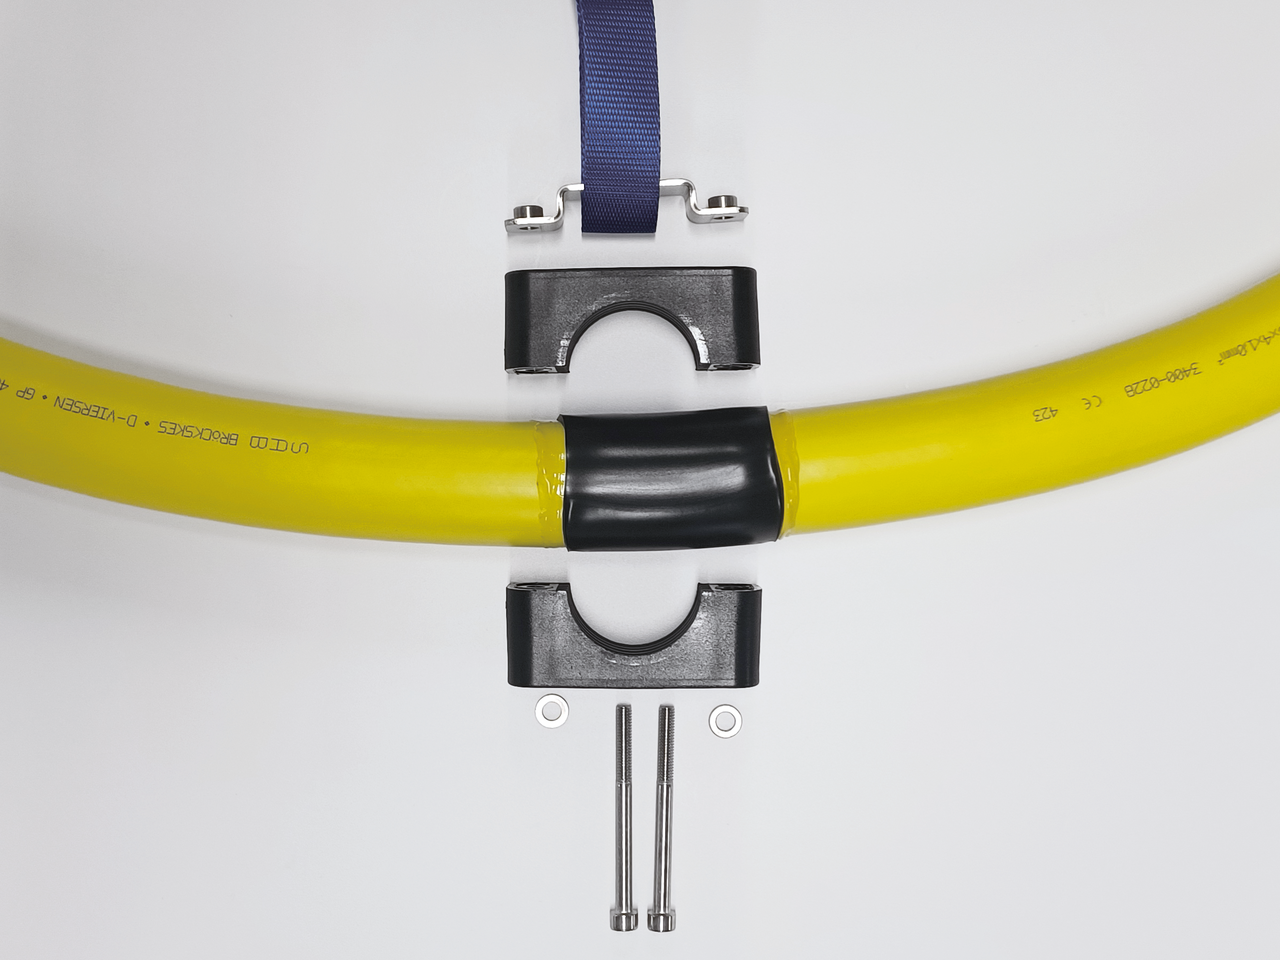
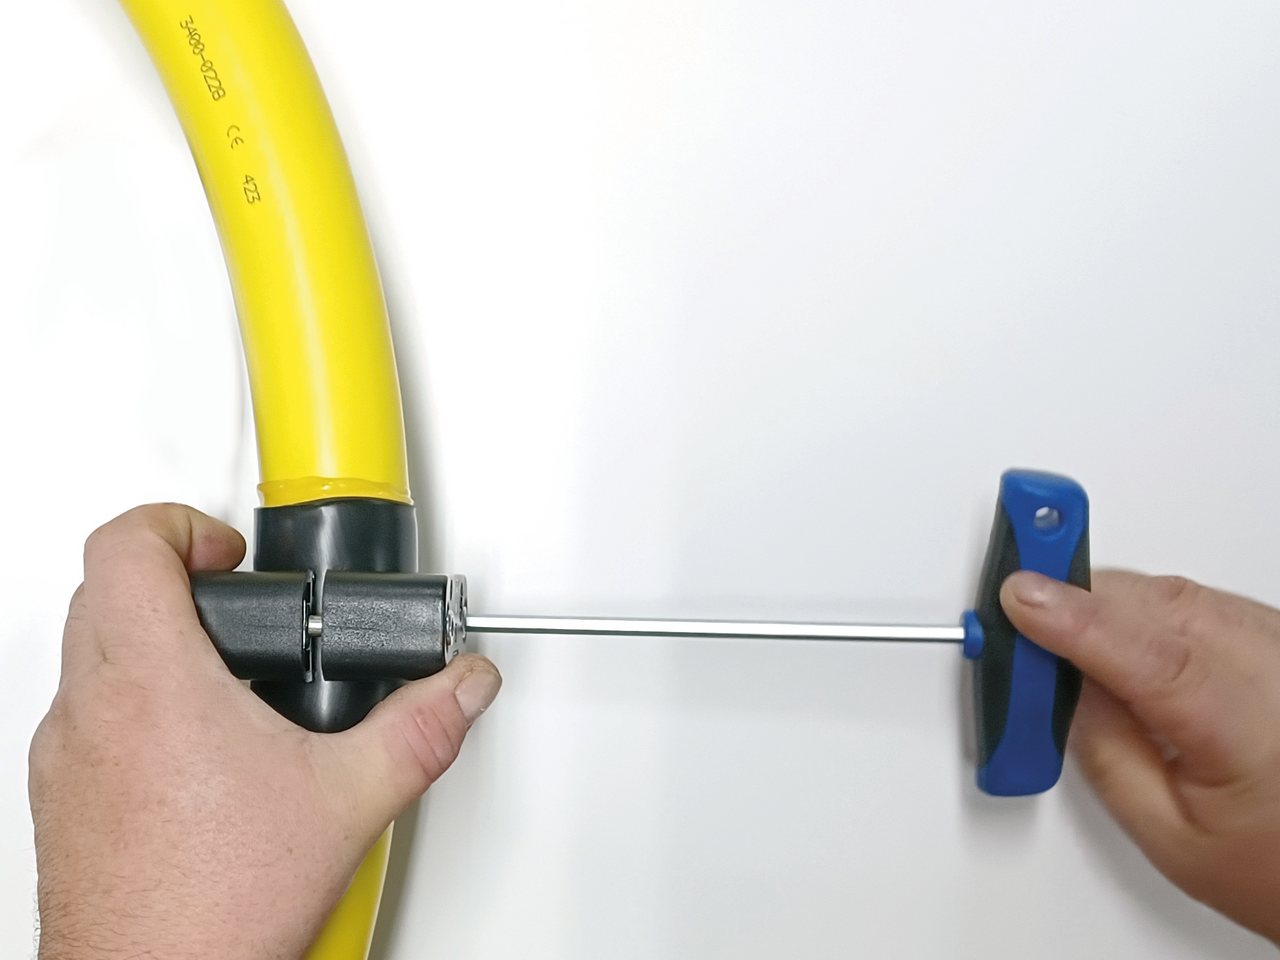
6. Inserting and securing the screws
Insert the screws into the designated holes from the plastic side and tighten them.
Step 6
7. Tighten to a defined torque (7 Nm)
Tighten the screw connection with the recommended tightening torque of 7 Nm. [5.0 mm Allen key]
Step 7
8. Final function and seat check
Finally, check that the cable clamp and the strain relief strap are securely fastened.
Step 8
Do you have any questions about our products? Your direct line to the SAB team